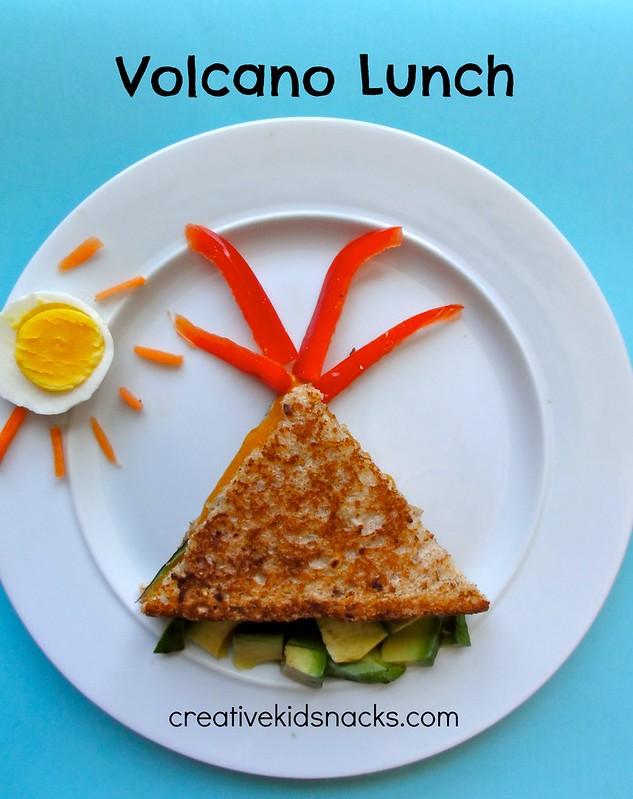
My daughter (5 years old), is really into volcanoes. She likes to study them, watch videos online about them, and find out all about how they work. For awhile, she was saying that she wanted to be a geologist when she grew up! We had made a volcano lunch last year, (click right here to see it), but I decided it was time for an upgrade to that version.
Volcano Lunch

This updated version of our volcano has more veggies and healthy ingredients than our first one. The volcano itself is a grilled cheese sandwich (well, the equivalent of half of a sandwich as it was sliced into a triangle shape) – and this is because my girls are just crazy about grilled cheese. I try to buy organic cheddar cheese and minimally processed bread to use in their sandwiches. Place thinly sliced red pepper atop the volcano to look like lava. Fresh red bell pepper is packed with vitamins and has a sweet, refreshing taste that my kids really like. The “ground” beneath the volcano is made up of avocado, which is a great source of healthy fat and considered a superfood. A sliced boiled egg as the sun in the sky will provide some good protein, and thin strips of baby carrot provide the sun’s rays.
Make Your Own Volcano
When my daughter Grace first heard about lava on a Disney show called “Little Einsteins”, she suddenly wanted to know everything about it. I explained to her how a volcano works, talked about the magma underneath the earth’s surface and all of the details about how pressure forms inside the volcano until it erupts. She asked tons of questions, and that evening when we got home she asked to watch videos of lava.
Thanks to Youtube, we were able to see all kinds of lava flows. This was one of my favorite ones (if your kiddo is into volcanoes too). Or, check out these great general videos on how volcanoes work.
After several days on the lava bandwagon, I had the idea to actually make a volcano with her. Why not right?
Here is what we made, followed by some instructions on how to make your own:
Materials to gather:
Cardboard
Plastic (disposable) cup, cut down to half it’s original height
2 teaspoons baking soda
4-5 drops of red food coloring
1/4 – 1/2 cup vinegar (any kind)
Large surface to catch the flowing “lava”
Directions:
First, build a “volcano”.
We used a cardboard box, (rolled up and taped together), but you could mold one out of play-dough, use paper maché, or even a mound of real dirt.
Next, place a small cup inside the top hole. The cup should sit snugly in the opening at the top of the volcano. I used a plastic cup that I cut to be shorter (about the size of a cup measurement). The cup is where your explosion ingredients are mixed.
Add 2 teaspoons of baking soda.
Next, add 4-5 drops of red food coloring.
Finally, take about 1/4 cup of vinegar and slowly pour into cup over the baking soda.
The explosion fizzes out and runs all the way down the volcano.
The “lava” is red because the food coloring mixes with the baking soda as the eruption happens so no need to mix the food coloring all the way through.
Have fun learning all about volcanoes, and then eating one!

Tell me what some of your favorite “experiments” or learning activities are for the kiddos. I know you all have great ideas! Feel free to link to a post you wrote about it in your comment. I’d love to check it out!


