are by no means least among the rulers of Judah;
for out of you will come a ruler
who will shepherd my people Israel.’”
 |
| (via) |
make fun of lunch!
by Amy Hudson
 |
| (via) |
by Amy Hudson
Is there a cookie that is more Christmas-y than gingerbread? Here at Creative Kid Snacks, we like to play with our food. We like to keep our snacks healthy, educational, and fun. Today’s snack is a Christmastime treat, so we will put it in the dessert category. While you’re here, you might enjoy checking out some of our other fun Christmas creations!
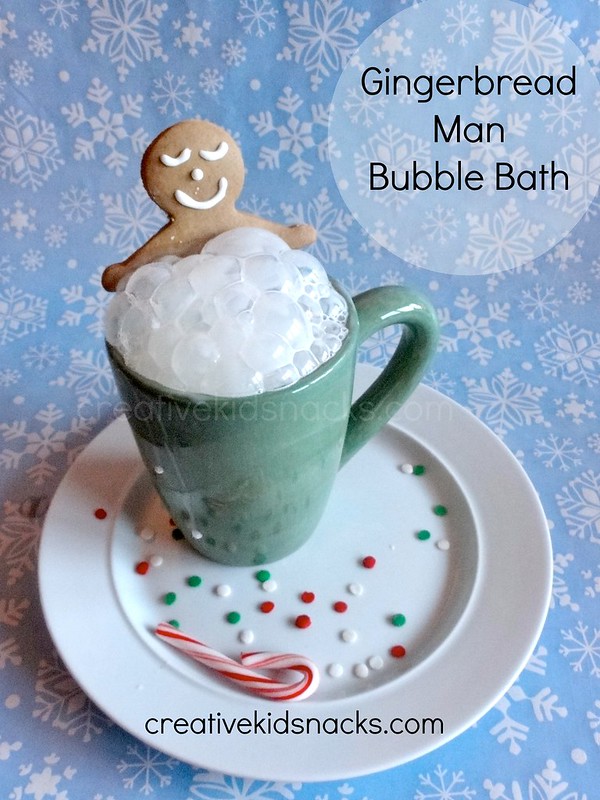
Everyone likes a relaxing bubble bath, including gingerbread men.
To make this creation, my girls and I first followed the Betty Crocker gingerbread cookie recipe, and used our gingerbread man cookie cutters to cut them to size.
Next, we used this recipe for royal icing to pipe the sleepy eyes and smile on our gingerbread man’s face. We chose to use royal icing because it stays put much better than a buttercream.
Once cooled and dried, we placed our gingerbread man into a mug filled with milk. We used cold milk because we like to eat our cookies with nice cold milk. If you like, you could also heat up the milk for a real “warm bath” for your gingerbread man. You could even add a bit of fancy peppermint flavor syrup like you’d get from the coffee shop if you had some on hand!
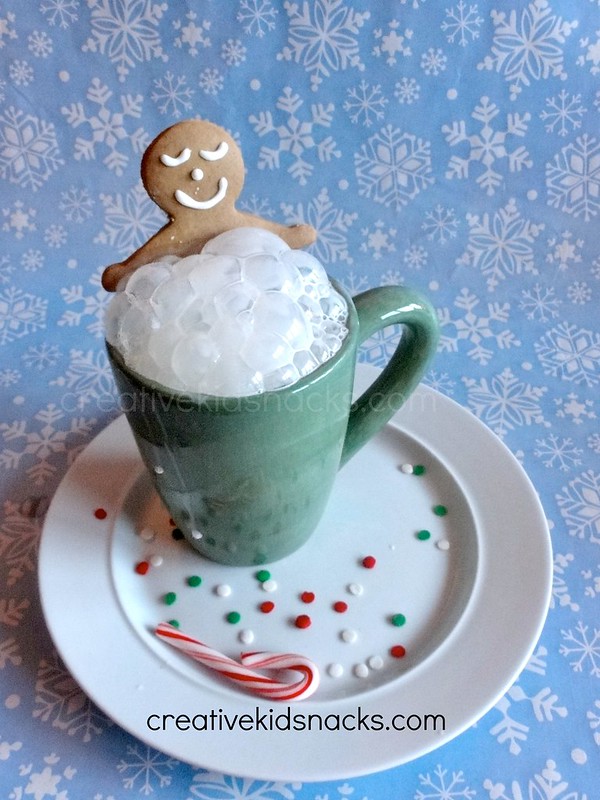
Next comes the fun part for the kids – making the bubbles! To make the bubbles, place a straw into your milk and blow! Blow until you have lots of beautiful white bubbles for your happy gingerbread man’s bubble bath!

You may also like the idea of letting your gingerbread man take a dip in a hot tub of warm cocoa. Follow all of the same directions as before, but this time, add some hot chocolate mix or chocolate syrup to your warm milk before serving!
Make sure the cookie cutter you are using for your gingerbread man has his arms out to the sides as opposed to down closer to his body. The ourstretched arms help the gingerbread man to rest comfortably in the mug as his arms hang over the sides.
Choose your mug carefully. Allow enough room for his body to submerge but not too much room or else his feet will float in the milk and he will look like he is ready to fall out backwards from the mug. If this happens, simply brace your gingerbread man with a straw or even a spoon before serving.
Blessings to your and your family this Christmas season!
Did you enjoy today’s snack? Don’t forget to check out our Christmas snacks along with some of our other favorites. You can learn more about this blog HERE.
by Amy Hudson
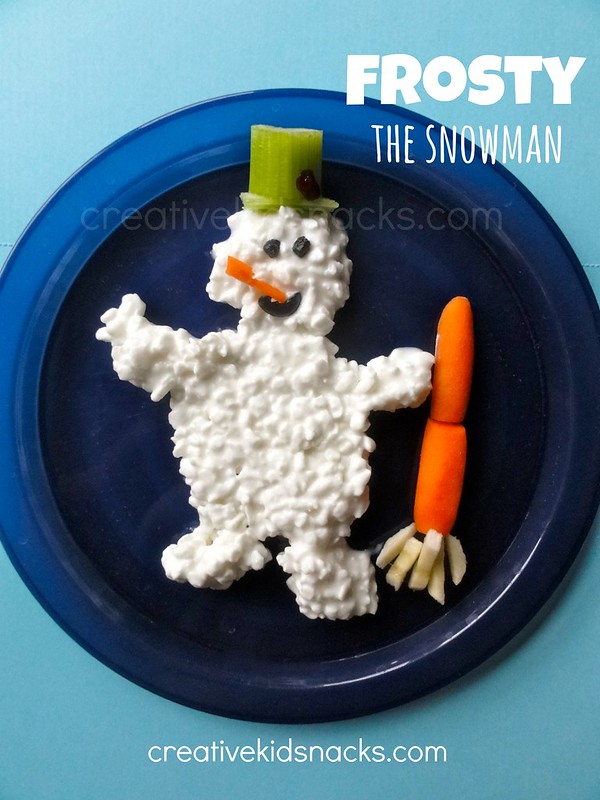
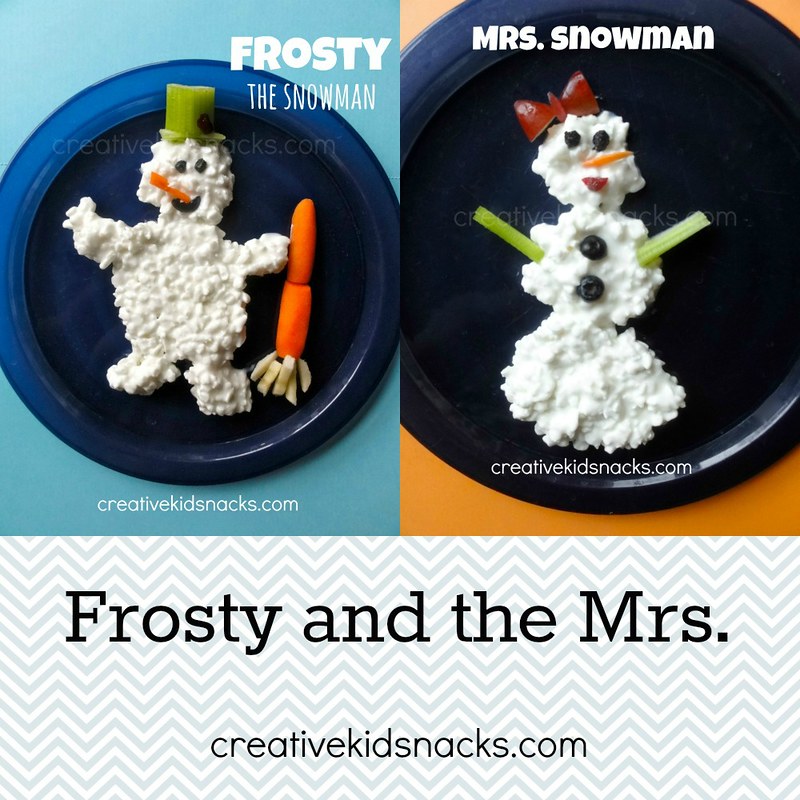
My girls love the Frosty the Snowman movie. We have a DVD of the same version that was on TV all the way back in the 80’s when I was a kid. They love to sing the song, “Frosty the Snowman, was a jolly happy soul . . .” The other day I decided to make them a snack inspired by their favorite snowman. (Even though we’ve already made these snowman snacks last year, today’s snowman looks just like Frosty from the movie).
3/4 to 1 cup cottage cheese
1-2 baby carrots
1 slice of banana
1 dried blueberry (I buy the large bag available at Costco)
1 fresh blueberry
2 small slices celery
1 dried cranberry
Use a small spoon to scoop the cottage cheese onto the center of the plate. Gently spread it out to make the largest part of Frosty’s body – his tummy. Next, spoon each leg on and gently slide cottage cheese into shape if needed. Follow the same process for his arms. Cottage cheese is great, because it naturally falls into the shape of fingers at the end of an arm. You won’t have to use your fine motor skills for this step! Slice one square piece of celery, along with one thin rectangular piece, and place atop Frosty’s head. Add a dried cranberry to look like a flower. Slice a small dried blueberry in half and place onto Frosty’s head for eyes. Slice your fresh blueberry in half, then slice a crescent shape out of one of the halves, and lay that flat onto Frosty’s face for his smile.
Slice a baby carrot in half lengthwise. Lay one above the other next to Frosty to look like his broomstick. Slice one banana wheel. Carefully take your knife and slice thin sections from the wheel. Place onto plate to be the bottom of the broom. To make Frosty’s pipe, slice a baby carrot in half lengthwise, then slice one of those halves again (lengthwise), so you have a flat rectangular piece of carrot to work with. Slice a pipe shape, aiming to get a thin rectangular piece with a squared piece at the end. Place the pipe right into Frosty’s smile, and he is complete and ready to delight your little ones!
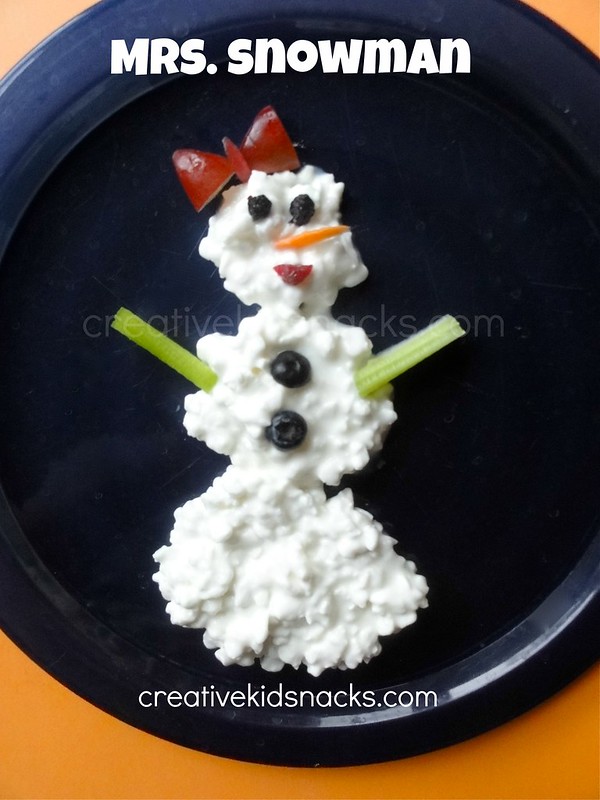
After I made Frosty for my oldest, I decided to make him a little friend. She was easier and faster to make than even him. Meet Mrs. Frosty.
3/4 cup cottage cheese
2 fresh blueberries
1 red grape
1 dried blueberry
1 small section of celery
1 dried cranberry
1 baby carrot
Use a spoon to scoop and carefully shape three cottage cheese circles onto the plate for Mrs. Snowman’s body. Next, thinly slice a section of celery and place onto plate for her arms. Slice a dried blueberry in half and place onto her head for eyes. Slice a dried cranberry in half width-wise and place beneath eyes for Mrs. Snowman’s mouth. Add two fresh blueberry buttons and a red grape bow. To make the bow, slice a red grape in half lengthwise, then slice a triangle out of each half and add a remaining sliver of grape for tie of hair bow. Complete her with a tiny sliver of a baby carrot (proportional to her face), and you are done!
Enjoy!
If you enjoyed these snowmen, check out our other snowman creations, (our snowman milk chugs are super easy and fun), along with the rest of our Winter and Christmas snacks!
(Linking up HERE)
by Amy Hudson
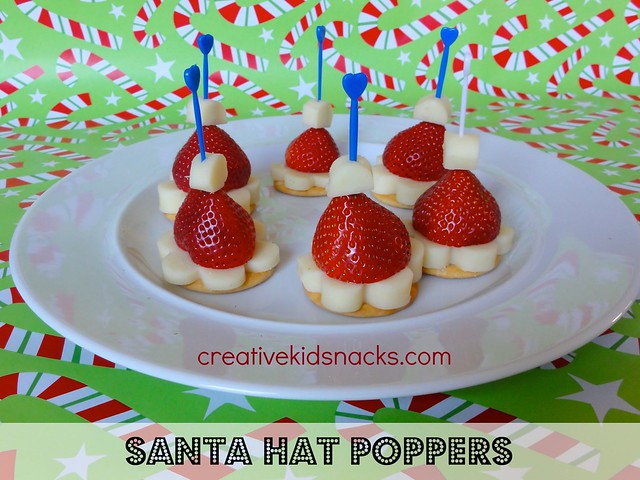
Looking for cute Christmas Party Food? Today’s Santa Hat Poppers would be the perfect Christmas Party food for kids. Make these Santa Claus inspired party poppers for your next holiday party or put them out at your next playdate to get the kids excited for Christmas.
By the way, you’ll probably love these other cute Christmas Party food ideas for kids: Grinch Party Poppers, Santa Party Poppers, Popcorn Snowman Cups, Snowman Party Poppers
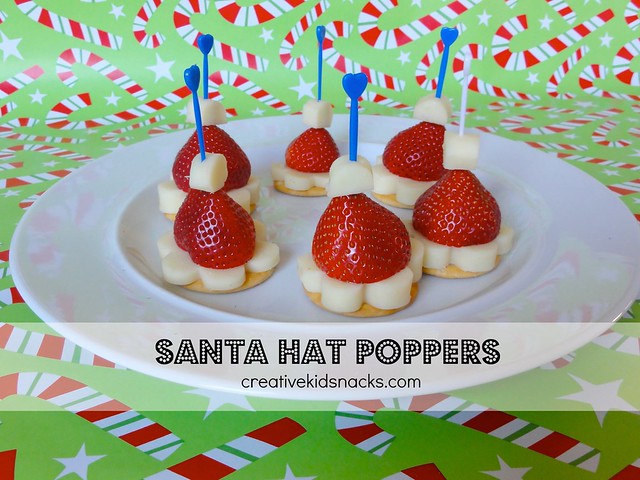
10-15 oz block mozzarella cheese (sliced from a large block)
6 fresh strawberries
6 round crackers (Ritz, Toasteds, etc.)

Using a large block of mozzarella cheese from the grocery store, slice 1/8- 1/4 inch slices of cheese. You want the slices to be large enough to be able to punch two hat bases (using 2 inch cookie cutter shown below) out of each slice.

Use a cookie cutter shaped like a flower or a circle (the one shown here is about 2″ wide), and punch out little bases for your Santa hats. A flower has a cute look once the hats are assembled because it looks like fluffy white fur.
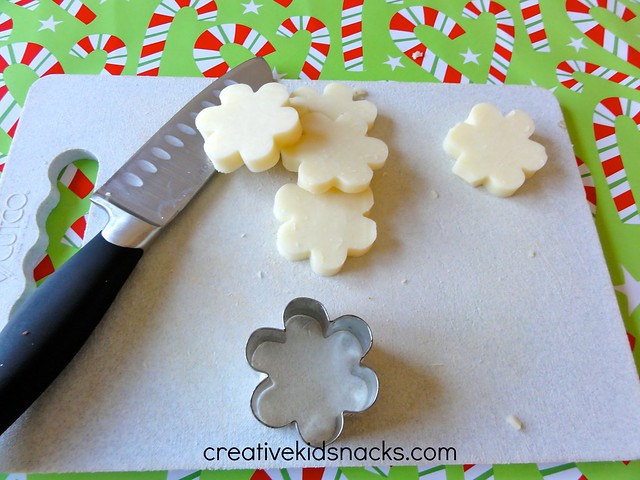
Your bases are now ready!
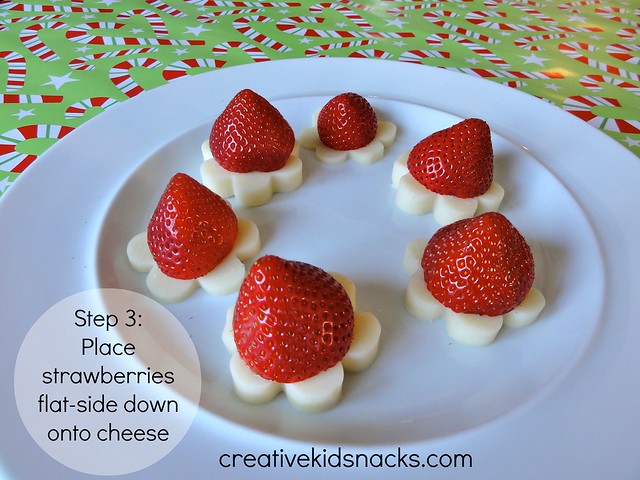
Slice the stem off of your fresh strawberries. Try to use strawberries with a width that would allow you to see your cute little hat base and not cover it up entirely, or look too small on the base you made.
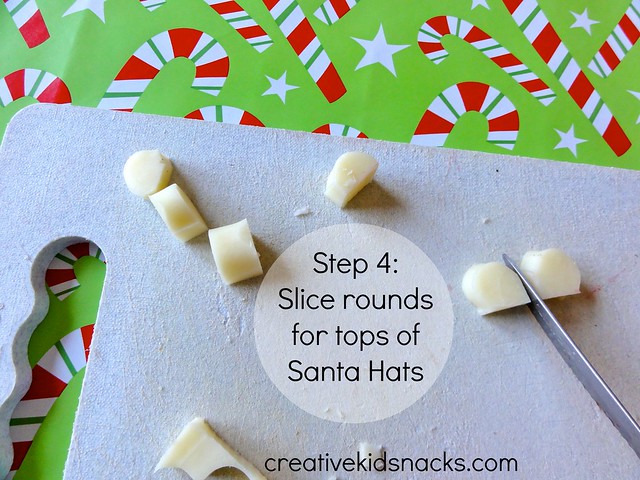
I punched one more “flower” or Santa Hat base out than I needed, and sliced the little round edges into semicircles for the tops of Santa’s Hat.
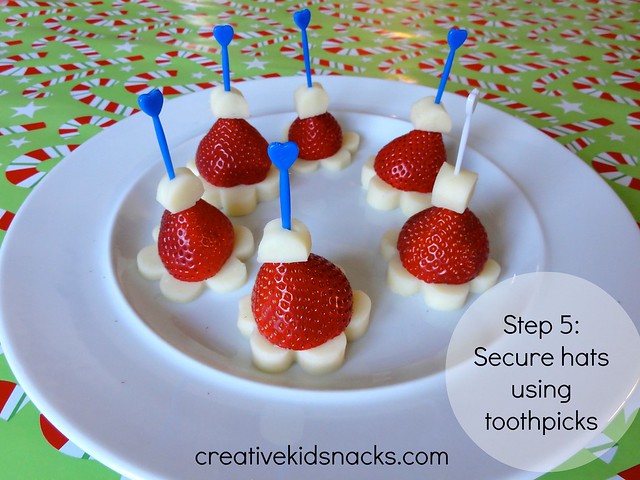
I love to use the little plastic toothpicks from the dollar store. They are not too sharp, and look adorable to hold these little guys together. Note: Make sure the top semicircle of cheese is thick enough to allow the toothpick to go through without the cheese falling apart. The block mozzarella cheese I used worked great and did not fall apart. I kept my semicircle cheese hat toppers to at least 1 cm thick.
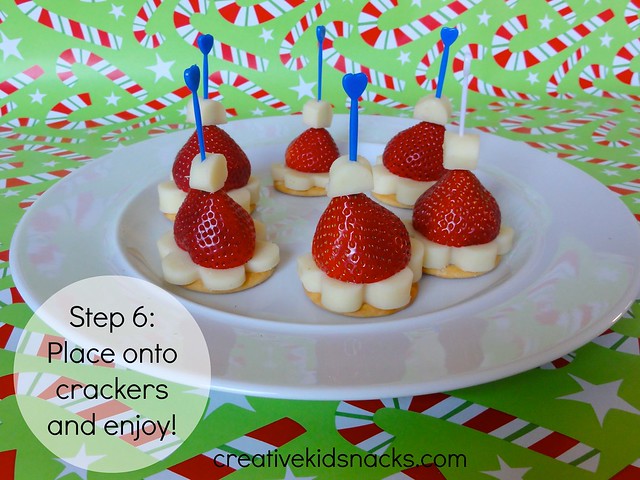
Although the Santa Hats look great and are ready to eat by step 5, I would suggest placing a cracker beneath each one. The saltiness of the cracker tastes great with the cheese, and also the cracker makes for each pick-up from the plate. This part is optional, but that’s my recommendation.
Your Santa Hat Poppers are now complete and ready to put out at your Christmas party or play date! The kids will love them! Mine sure did!

Enjoy!
5 Healthy Christmas Snacks for Kids
(Sharing HERE)
Did you enjoy today’s snack? Learn more about this blog here.
by Amy Hudson
by Amy Hudson
by Amy Hudson
Use a large round serving platter. Start with the celery, and create several zig-zaggy rows going accross.
Next, fill in the yellow peppers, saving one for the “hook” on top, then carrots, then cherry tomatoes, and you are all set!
I got the idea for this Christmas present veggie tray when I found the following little boxes at Walmart.
I bought the boxes with the inspiration for this veggie tray, but knowing I could eventually use them as gift boxes down the road.
What I did to create the present was to place all four boxes onto a larger platter, tie a nice thick ribbon around them to make them look like a present and then LINE them.
To line each box, simply open a baggie, roll the top zipper part over so it lays on the outside of the bag, and fill with the veggies. This will ensure the boxes stay dry and, the best news of all, the veggies are easy to put away once the tray is done being used!
Try this fun and popular idea with the kids this year!
To me, the very best part of making these fun trays with your kids is the fact that they are munching on veggies the whole time!
by Amy Hudson
(Linking up HERE)
by Amy Hudson
I’ve taken to calling anything on a short stick a “popper” because you can pop it into your mouth and enjoy in one or two bites.
Make sure you slice your banana into chunks evenly and straight to ensure that they do not lean or tip over once assembled.
(Linking up HERE)

by Amy Hudson
Our sweet snowman has a cottage cheese body , raisin eyes and buttons, 1/2 a baby carrot for a nose, and celery sticks for arms.
Scoop the cottage cheese onto the plate with a small spoon into three circles. Slice your baby carrot in half and add for his nose. Place his eyes and buttons on, and finish with arms. Done!
You can’t get much healthier than this for a festive winter snack!
Variations:
Use pretzels for his arms to look more like sticks
Use yogurt for his body
Use blueberries for his buttons
