I remember learning about cells when I was in 7th grade. For extra credit, I made a cell cake. My mom helped me decorate a round cake and create all of the cell components on top using different colored icing and piping instruments.
The cake turned out so well that my teacher decided to place it in a display case in a prominent area of the school. I laugh thinking back at that because the cake sat in there for so long that it started to decompose, and we were never able to eat any of that delicious cell cake!
Aside from earning me those extra credit points, that cake helped me to remember and love learning about the cell.
Today’s snack is a healthy version of that same experience, and it could be done in a science classroom as a test on the parts of a cell, or at home as part of a home school curriculum. You could also make it for your younger kids just to teach them about the cell and how it all works, like we did!

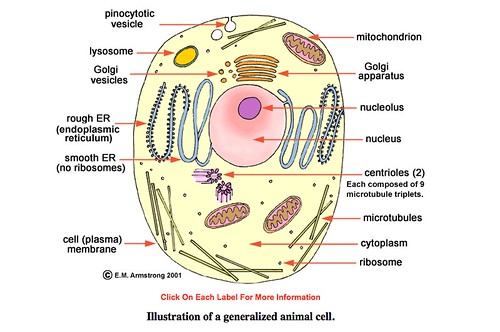
As I was creating this snack for my 5 year-old, I pulled up this great site which gives clear explanations of each part of the cell, along with easy-to-understand drawings and diagrams. I modeled today’s plate after this diagram on the site:
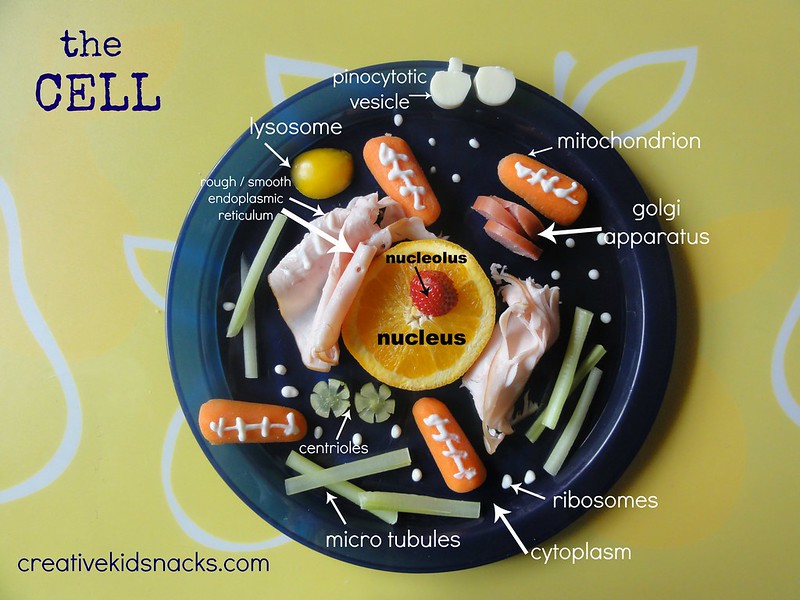
Cells have lots of different components, and can be made using just about anything you have on hand in the kitchen. Since we were going for a healthy snack today, here is the list of ingredients we used:
Ingredients
celery (1 stalk)
turkey breast (2 slices)
yellow pepper
strawberry (1 small slice)
orange (1 slice)
carrots (2)
green grapes (1)
yogurt (1 tablespoon)
hot dog slices (3 thin slices)
string cheese (2-3 small slices)

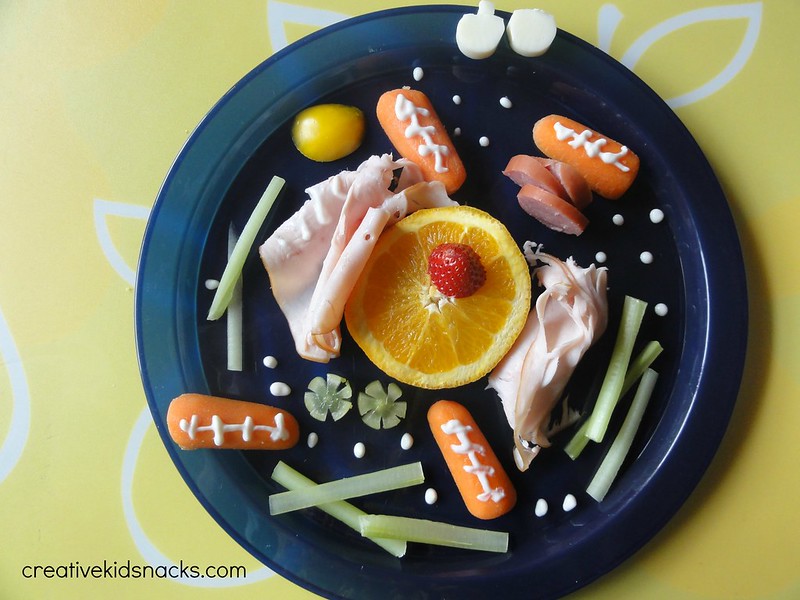
Create your cell by arranging each element on the plate as shown.
The carrots are sliced in half so that they lay flat on the plate.
To create the shape of the centrioles (green grapes), slice a green grape into wheels, then slice tiny triangles out of the edges.
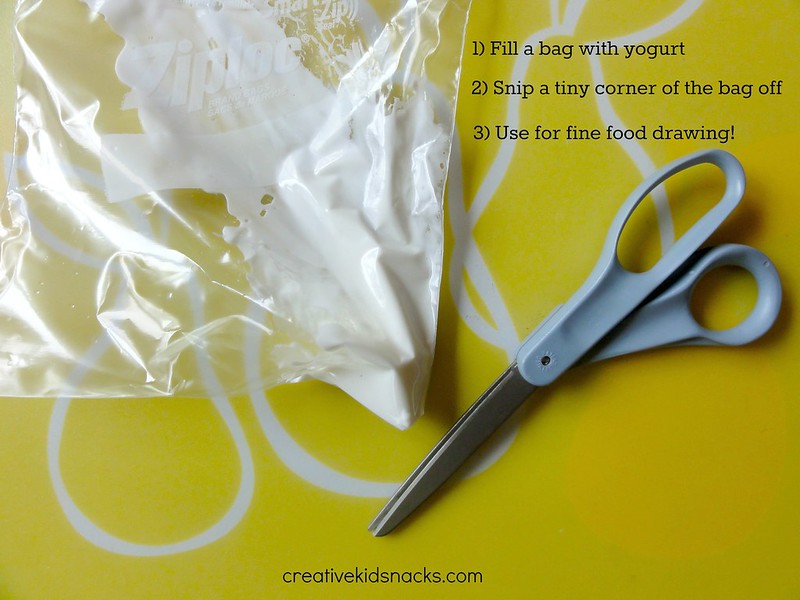
The ribosomes (yogurt) are made using the following technique (which we absolutely love!):

The finished product:
How to use this snack / activity
Challenge your (older) student to create a cell at home for a snack using some of the ingredients pictured here. Your student can see if he can name each part of the cell and what its function is when he is done.
Teach your younger children about the human body using this snack. You could draw the different parts on index cards, and write the function of the part on the back. Your children can pick up one card at a time to learn what that part of the cell does. They can even eat that part as you explain what its job is.
Science teachers could use this as an assessment activity. Provide foods such as those pictured here, and assign students to create a plate of the animal cell, and be prepared to explain what each part is and its function.
Use resources like this to dig deeper and learn even more together with your child!
More Science Related Snacks
(Sharing HERE)
Did you enjoy today’s snack? Learn more about this blog here.


What a great way to make a project that will be remembered for years to come! I will be featuring you this week on Mom’s Library http://www.crystalstinytreasures.com stop by and pick up your badge and link up some more great ideas!
so colorful. please come by and share this on our #kidsinthekitchen linky this week http://lookwhatmomfound.com/2013/05/making-a-forever-flower-kidsinthekitchen.html
I love when people use food to teach science! I guess it is a built in thing to me since I took cupcakes as an atom of Neon to school in the sixth grade! lol Thanks for sharing at Mom’s Library!